Jul
17
How to disable system beep in RHEL (CentOS) 5
Filed Under Howto, Linux | 8 Comments
CentOS 5(probably RHEL too) comes with system beep enabled by default.
This could be very irritating because the sound comes from system speaker and cannot be disabled with sound controls.
Solution:
go to system–>preferences—>sound—>system beep and uncheck it.

Now you will have system beep only at login.
Jul
13
How to unlock yourself – Linux screensaver
Filed Under Command line, Fix, Howto, Linux | Leave a Comment
Today I’ve accidentally locked myself with Linux screensaver.
How this happened?
I use English letters for my password, but when I’ve stepped back from my Linux workstation my keyboard group was with group different than English.
As result when I come back and tried to unlock myself I couldn’t enter the correct password.
Solutions:
1. First and simplest solution will be to kill X with Crtl+Alt+Backspace
2. Reboot the PC – Alt+Ctrl+Del
3. Try to fix it
Because I’ve had open and unsaved documents first 2 options will result loss of my work I’ve decided to go with third one.
How I did it:
A requirement is to have another PC and ssh access to main one.
1. Login via ssh to locked PC.
2. Start vnc server under your account
vncserver
Note you will need vnc server installed. How to do it is out of the scope – consult your documentation.
3. Open firewall ports required for VNC or simply shutdown firewall
/etc/init.d/iptables stop
4. On other PC start VNC client and connect to locked one
5. Start keyboard configuration
gnome-keyboard-properties
6. Remove all other layouts except English
7. Now you can return to locked PC and unlock it.
NOTE: This procedure was tested on LAN and CentOS 5.
Jul
13
Default password list
Filed Under Howto | Leave a Comment
Every SysAdmin needs somethimes to access to equipment who’s documentation is missing.
Then the Default password list is the source to find your default pasword.
I’ve made local copy just in case.
Default password list 03.07.2007
Jul
11
Fixing Adobe Acrobat Reader “expr: syntax error”
Filed Under error, Fix, Howto, Linux | Leave a Comment
After updating my Linux workstation I found that acroread produces “expr: syntax error” when started.
Quick Googling show me the solution.
- Open terminal.
- First find where acroread executable script is located – on my machine:
whereis acroread
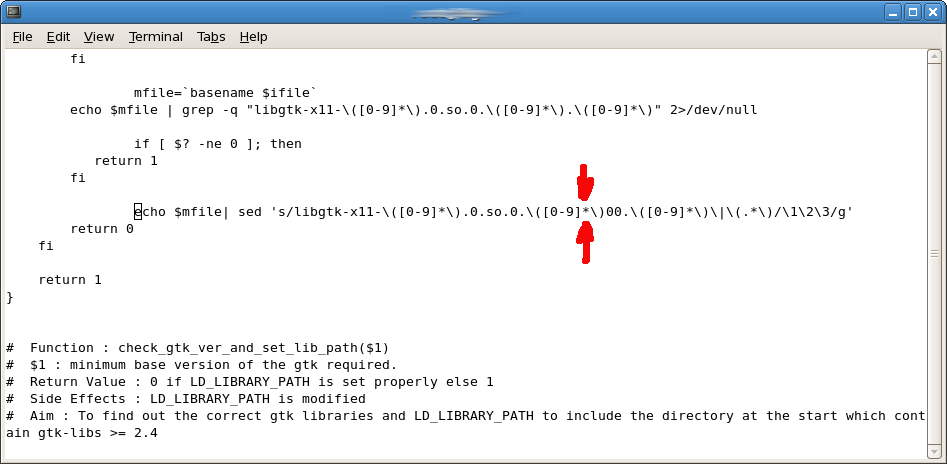
acroread: /usr/bin/acroread /usr/lib/acroread - Then type vi /usr/bin/acroread.
- After that type 418G and add *(asterisk) [move cursor after the block press i for insert and *]after second [0-9] block as shown below
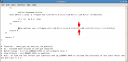
- Then save the file [Press Esc 2 times and type :wq]
- Now you can use acrobat again.
NOTE: This fix is for AdobeReader_enu-7.0.9-1 for Linux. It is not tested on other versions or platforms.
EDIT: How to install AdobeReader_enu-7.0.9-1 in CentOS 5/4.x.
Navigate to adobe.com –> Click on get adobe reader –>Choose .rpm version –>Click on Download –>Either Open with Software Installer or download to disk and install if you need to do it on multiple machines.
Jul
10
Howto change default open with… application in Linux (Gnome)
Filed Under Fix, Howto, Linux | Leave a Comment
Usually on the same system there is different programs that can open the same type of files, but they also have different capabilities.
And “Usually” the program that we are comfortable with is not the one by default.
Here I’ll show you how to fix it:
- It is actually very simple. Just open file browser and navigate to file of the same file type that you want to change default program.
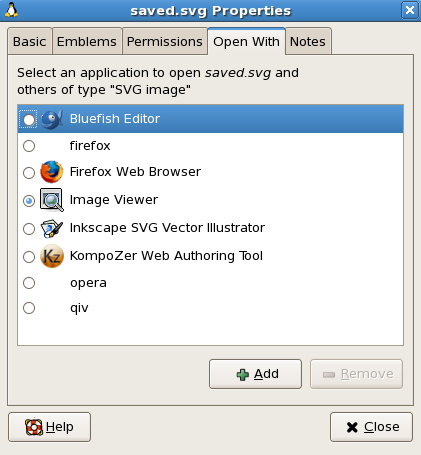
- Then right click with the mouse and choose properties. You will see similar window:
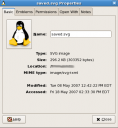
- Then click on Open with tab.
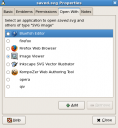
- Here you can change default open with program or add new one if it is not into list.
- Finally click close. (In contrast with other OS all changes are applied on close and there is no OK button)

That’s it.
Tip: Another way of doing it “Temporarily” is to right click and use open with…
Jul
9
When preparing for a post I was challenged by change in GNOME menus.
In CentOS 4.x there was Take screenshot application into menu, but in version 5 this application “disappeared”.
After quick search in documentation I’ve discovered that now I can take screenshot by pressing Print Screen button on my keyboard and if I want only active window I can press Alt+Print Screen
Here is the menu:

Jul
5
Removing user in Linux
Filed Under Command line, Howto, Linux, Unix | Leave a Comment
Today I removed the user in my Linux workstation.
Probably you will say that this is simple task just remove user home directory and his password, but appears that this is not.
First thing is that there is no single command that will do this task for you.
Let’s start:
1. Lock user – this is done with following command:
passwd -l <user_name>
This command will achieve it by changing the password to a value that cannot be matched by any possible encrypted value.
This command is usefull also for temporary disabling user account.
2. Search for and kill any user processes that still run
ps aux | grep -i ^<user_name>
kill -9 <PID number>
where <PID number> is the number in the column just after the user name.
3. Find all files that belong to this user
find / -user <user_name>|less
4. Decision time – decide do you want to keep those files or erase them. My suggestion is to backup them just in case.
5. List and remove any crontab jobs
List user cron jobs:
crontab -u <user_name -l
And if you see any entries remove them:
crontab -u <user_name> -r
6. Remove user from sudoers (if you use sudo)
visudo
7. Check any other applications as remote access, MySQL, Web App.
More extended howto